Friday, 10 March 2017

Physical Studio - Still Life

This workshop with John was about sketching still life. Unfortunately with my tonsillectomy, I missed this workshop so I did a catch up and did my own still life drawings. During these times, I was drinking a lot of McDonalds milkshake to soothe my throat so I decided to sketch the McDonalds cup. Here are the sketches:

Original


Here are the initial rough sketches I was aiming for, I wanted to catch the curves on the lids caused by shadows in the image. I decided to then highlight the M using a highlighter in the images below.


Here are small still life images using a fine liner. I wanted to focus on creating these miniature versions of the cup. I thought this idea was cool and was inspired by some drawings on Pinterest. It's focusing on line and I like the empty spaces around the drawing,


Thursday, 9 March 2017

Interactive PDFs

In this Indesign session, we created interactive PDFs. This included us creating interactive buttons in the form of shapes, text and video stills. I found it interesting the way we can make PDFs interactive where things are on loop or if you hover over then it can change colour. Moreover, here are some screenshots from the session: 


Kinetic Typography Film

The fourth workshop for our after effects tasks is this font tribute. This is a 10 second animation introducing a font I've selected called Orator STD. The animation is just below:

Orator STD (Font Tribute) from Faisal Islam on Vimeo.

I believe the animation went extremely well and I learned new skills during the making of this short animation. It started off pretty simple and as the workshop continued, you can also see how the animation progressed. We started with each frames designed on photoshop which was then dragged over on to after effects. The main element I found very interesting and fun to use was the animation on the text itself. Here is a screenshot below of which frame I'm referring to. I liked the magnifying style I've added to the word 'Small' which works very well. The composition of each frame is also consistent throughout. The ending was also a new technique I've picked up on, where the frame zooms in and rotates.


This is an example of the screen frame I've worked on in photoshop, which was all saved with layers so I can edit the text itself.

Morpholo Tile Task

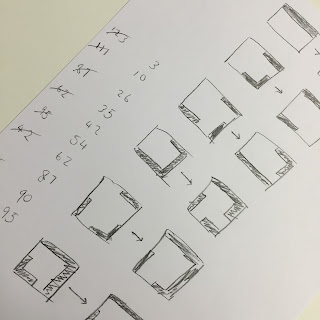
This task is an introduction to the Adobe Illustrator, which I've never personally used before. We briefly looked at Morpholo which is a visual tile game. We selected numbers and got aligned some tiles format which we were working on. The idea is to cover the square along with the format. This included hand drawings which we then designed on Illustrator.


Here are the tiles that I quickly sketched out. This progressed on to the shapes I've focused on from some fonts. These shapes are below:


I selected some arabic fonts which has unique alphabets which I focused on. Here is a screenshot when I was playing about on illustrator putting the tiles together. It was a challenging task because we had to fill the tiles and the tiles got harder the higher number we picked. I also think Illustrator is interesting to use and I will hopefully develop more skills from using it.


Wednesday, 8 March 2017

Speed and Motion - Character

In this post, we created a 10 second animation which involved an animated character moving. This is one of the workshop I missed due to my operation. However, I spent some time alone trying to create something. For this reason, it was challenging creating this animation without knowing how to create the character then to make it move. After some trial and error, I managed to get some animation happening. In the end, I am happy with the outcome because I managed to come up a short animation. The idea was a snowman character melting when it was night. Here is my video below:


Snowman Animation from Faisal Islam on Vimeo.

The music was chosen accordingly to the animation. I like how it begins all slow and consistent and then as soon as it's night, the notes go higher and almost sad. The character was created on Photoshop and also the background. To be self reflective, It would be better if the melting end was better. You can see the snowman features fall off as it melts but towards the end, it comes back to the snowman position, which I've tried amending. Overall, I am pleased with this after effects task and the making and processing on this video has helped me use after effects on my own.


Here is some screengrabs of Photoshop after I've sketched out my background and character using the paint brush tool on Photoshop. This was made up of all different layers which allows me to animate each element on after effects. Using this method also taught me how to bring over a psd file on to after effects and still keep the layer properties.

Physical Studio - Drawings 2

The second sketch workshop was on interior drawings. Below are some images I've taken to refer to whilst I was drawing. I tried to focus on different elements of my surroundings like the ceiling and the atmosphere around. To make progress from the first workshop, I've decided to add some colour to the table with my experimentations and do multiple drawings thumbnail sized. Here are the images below:


The outcome of these sketches turned out pretty well. I liked the thumbnail sized drawings which allows me to focus on the details. I've tried to add perspective in my drawings where possible. The layout of my page was intended because I wanted to have the hanging lights in the top centre. I used a different range of colours compared to before. This included colouring felt pens and also oil pastels. In comparison to the previous drawing workshop, I was happy with the slight improvement I've made. Below is an image of a closer look and our groups work presented.